|
<< Click to Display Table of Contents >> NShape Basic Tutorial Basic Tutorial: Styles |
  
|
|
<< Click to Display Table of Contents >> NShape Basic Tutorial Basic Tutorial: Styles |
  
|
In this step you will learn how to define and use styles.
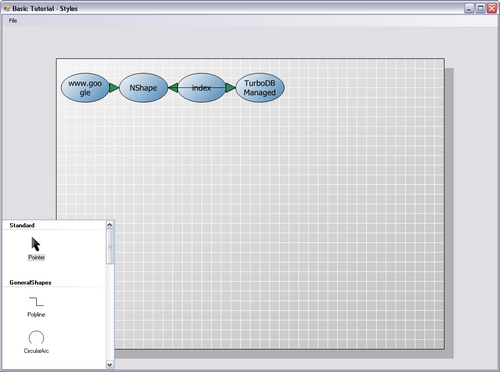
But wait, these arrows are no arrows – just lines. In order to become arrows they need a cap on the side of the referred page. Giving the lines a cap is not a difficult task, since lines have a StartCapStyle and an EndCapStyle property. And that brings up the concept of styles in NShape.
Styles define a visual aspect of a shape. There are styles for color (ColorStyle), filling (FillStyle), line drawing (LineStyle), fonts (CharacterStyle), texts (ParagraphStyle) and also for line caps (CapStyle). A cap style defines the color, form and size of a line cap and is - like all other styles - part of the project's design. Whenever you want to define a line cap you do not indicate the color, the form or the size directly at the shape but you refer to a cap style. The advantage of this approach is at least threefold.
| • | It saves some memory, which is not relevant for small diagrams, but might become interesting when you work with many 100.000 shapes. |
| • | It enforces a uniform look throughout a diagramming project, since one cannot for instance sloppily set many different cap sizes. |
| • | It makes changing the design of a large diagramming project easy, because modifying a style is sufficient to change many thousand shapes in a consistent manner. |
So what you have to do is select the appropriate cap style from the project's design. In general styles have names like the shape styles but there are also standard styles that must always be present and can be reached through properties.
| 1. | Add this line before the arrow is connected to the web page shapes: |
arrow.EndCapStyle = project1.Design.CapStyles.Arrow; |
| 2. | Run the application and load the Web statistics. The web page shapes are now connected by arrows directed towards the referred page. |
Perhaps, you do not like the size, the color or the form of the line caps used now. In this case you can modify those properties in the design of the project, preferably immediately after the project has been opened. For example you might want a smaller cap in green color and filled.
| 1. | Add this line immediately after the project has been opened: |
((CapStyle)project1.Design.CapStyles.ClosedArrow).CapSize = 20; |
| 2. | After modifying the style, you have to update it in the repository. |
project1Repository.Update(project1.Design.CapStyles.ClosedArrow); |
| 3. | Run the application and see how the arrow styles have changed their look. |

Defining and applying a cap style converts the lines to arrows.
Three aspects of this code deserve closer examination.
First, why is the cast to CapStyle necessary? The Arrow property returns an ICapStyle, which is a read-only interface, because almost all access to styles is read-only. The implementing class CapStyle however has a read-write property, so casting is a simple way to get write access to the property.
Second, from the code above you can see that the color of a cap style again references another style, the ColorStyle. This reference guarantees that the color scheme of the NShape project is always consistent. If a designer decides to make the green somewhat lighter, all greens in the project immediately reflect that change.
Third, the style is accessed through a property, but what if you add your own styles? All styles can also be accessed by using their name as index of the style collection:
ICapStyle capStyle = project1.Design.CapStyles["ClosedArrow"]; |