|
<< Click to Display Table of Contents >> NShape Basic Tutorial Basic Tutorial: Editing Diagrams |
  
|
|
<< Click to Display Table of Contents >> NShape Basic Tutorial Basic Tutorial: Editing Diagrams |
  
|
In this step you will learn how to enable diagram editing.
Similar to other drawing programs, NShape uses tools to manipulate diagrams. There are different tools for different purposes, for instance a general tool for selecting, moving, resizing and rotating shapes, a tool for inserting shapes, one for drawing polylines etc. Each tool is represented by its specific tool class. At one time, one tool can be assigned to the display and is then used to edit the diagram.
| 1. | Add the namespace Dataweb.NShape.Advanced to the main form code file. |
| 2. | Add the following code line to the Form1_Load method immediately after the call to LoadDiagram: display1.ActiveTool = new SelectionTool(); |
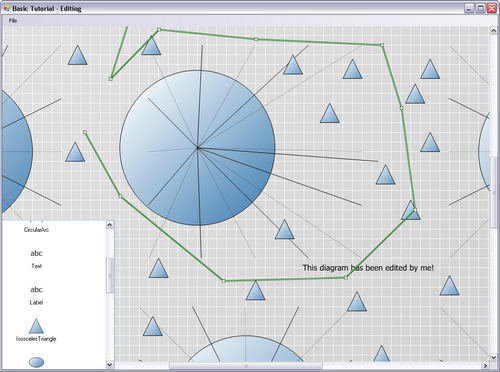
| 3. | Run the application. You are now able to select shapes, move them around, resize them etc. |
When you want to let the user choose from various tools, the program needs a tool palette. NShape provides three classes to support that. As always, the design pattern is a controller-presenter pattern. The ToolSetController performs operations on the diagramming logic, for instance creates, searches and deletes tools. The presenter implements the presentation logic and connects the controller with the view. The latter depends on the user interface technology and screen control used. For the tool palette, NShape offers two different presenters. The ToolSetListViewPresenter connects the ToolSetController to a Windows ListView component to create a tool palette. With the ToolSetToolStripPresenter, the application can employ a Windows ToolStrip control for use as a tool palette.
| 1. | Add a ToolSetController and point it to the DiagramSetController. |
| 2. | Add a standard Windows ListView control. |
| 3. | Add a ToolSetListViewPresenter and point it to the ListView and the ToolSetController. |
| 4. | Remove the line that sets the current tool from the Form1_Load method. Now that a tool palette exists, it will do that for you. |
| 5. | Run the application. You can now select tools, insert additional shapes etc. |

As soon as the display has an assigned tool, the user can edit the diagram.
When the user has modified the diagram, he will want to save his work. As you might expect, the project uses the repository to do that.
| 1. | Add a standard Windows MenuStrip, add a menu item File > Save and create an event handler for it. |
| 2. | The code in the event handler is: project1.Repository.SaveChanges(); |
|
Before you try that out, you might want to create a working copy of the diagram. |
| 3. | Run your application, modify the diagram, save it and close the application. Run it again to see your changes have been saved. |